info@mykey.shop


Prepare for installation and install Windows 10 operating system
This guide will help you step by step on how to download Windows 10
Burn DVD or copy USB stick and then use it on your computer
can install.
1) Step 1: Download the Windows installation files
2) Step 2: Prepare a bootable operating system DVD or USB stick
for devices without a DVD reader
3) Step 3: Install the operating system on your device
Preparation step 1: Download the Windows 10 installation files
To be able to install your desired Windows system, you need one
so-called “ISO” file. This contains all the necessary installation files.
You will receive the download links for installing the necessary ISO files by email with your key.
If you already have an ISO file, you can do this
skip.
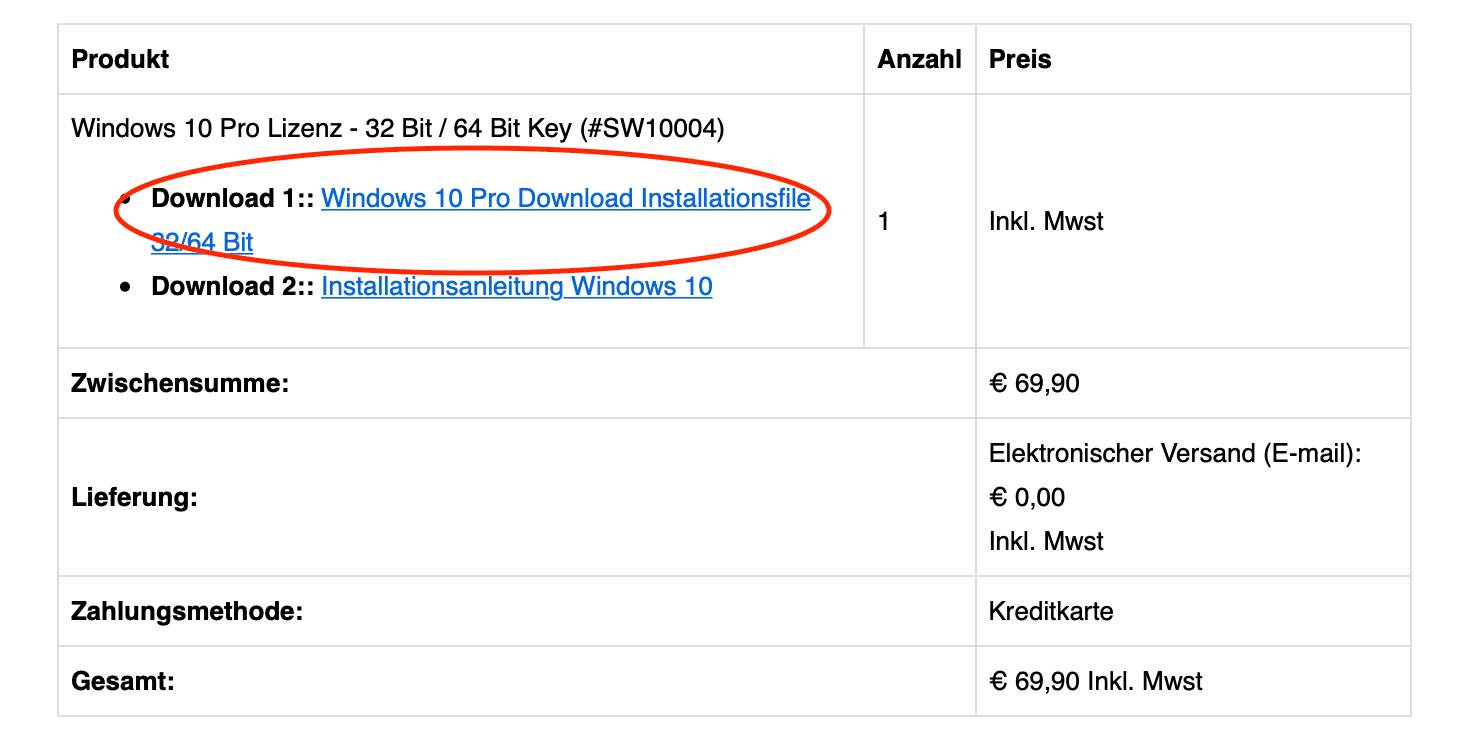
Download Windows 10 installation file
Please click on the “Downloads” link available from myKey
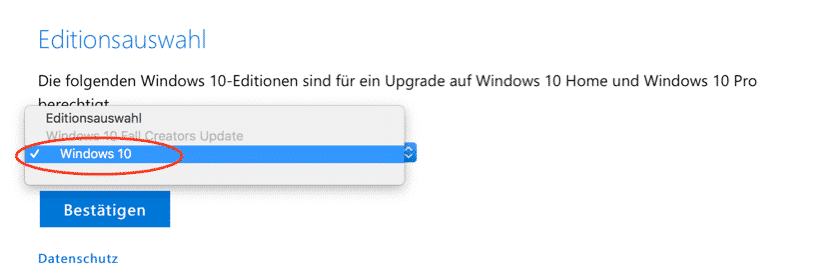
is provided. On the Microsoft website please select “Windows 10”.
DO NOT use the version with “K” or , if selectable
“KN” or “N” – these are modified versions that do not match myKey
sold product keys are compatible.
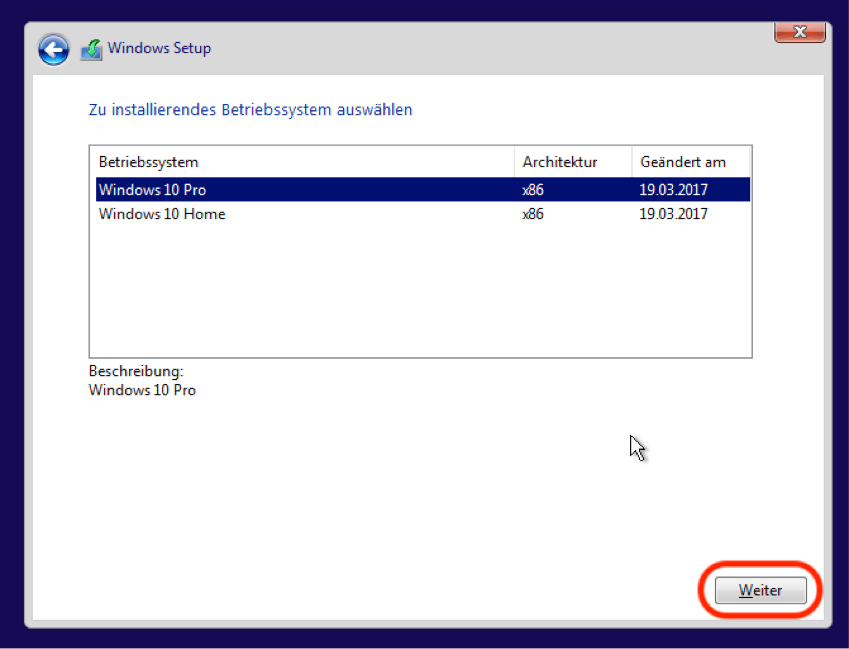
This download image is suitable for installing Windows 10 Home and
Windows 10 Pro. You can sign up for your desired version later during the
Decide installation yet.
Preparation Step 2: Prepare a bootable operating system DVD or
USB stick for devices without a DVD reader
Here you can choose between DVD or USB stick installation
- a) You burn the installation files onto a DVD. It is important that not
simply burn the ISO file onto the DVD,
a special burning process is made bootable. There are two here
Methods that we recommend. If one fails, please try the
other. Windows XP and Windows Vista users definitely need to
Use method 2. - b) You prepare a USB stick specifically so that it becomes bootable and that
Operating system can be started with it if the computer e.g. Not
has a DVD drive. There are two programs here that we
recommend Windows USB / DVD Download Tool and Rufus, see also
Method 3 and 4.
There are several ways to burn a bootable DVD to Windows, we show
First, the simplest function that can be used directly from the system.
Burn a bootable Windows 10 operating system DVD (method 1)
From version Windows 7 it is very easy to create a bootable DVD with the
to burn in-house tools. (If you are still using Windows XP or Vista
please scroll to “Method 2”).
1) When the download is finished, find the downloaded file in the
Explorer and right click on it to
Select “Burn Disk Image” .
2)Now the “Windows burner for disk images opens. Select the drive used, insert a blank DVD and click on “Burn”.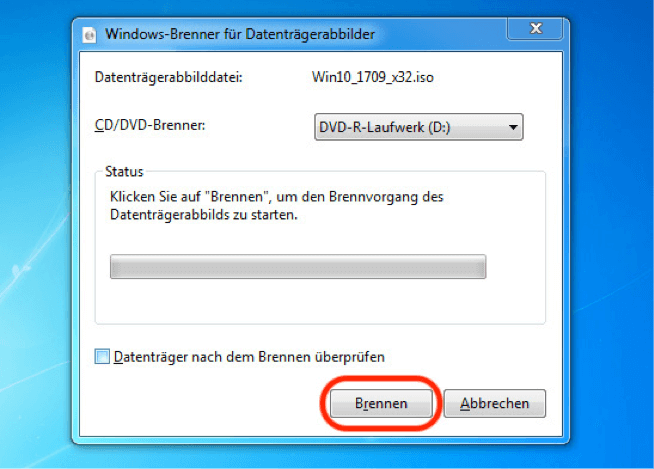
When the process is finished, you can use the DVD for installation.
Burn a bootable Windows operating system DVD from Windows XP (method 2)
Under Windows XP and Vista there are unfortunately no native tools to create a bootable DVD. However, there is a very established freeware called “imgburn” that can be used to burn operating system bootable system DVDs with ease. The software is compatible with Windows XP and Windows Vista.
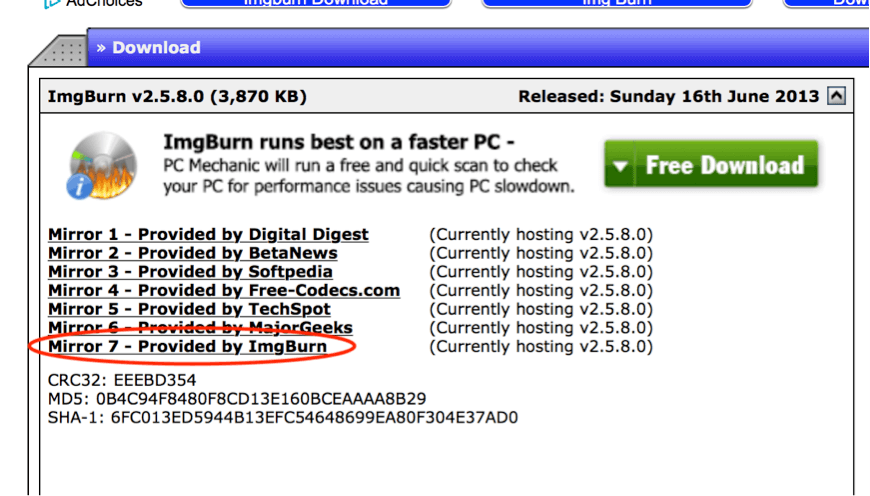
1)Go to the Webseite http://www.imgburn.com/index.php?act=download and click „Download“

2) Now click on “Mirror 7” and download the program
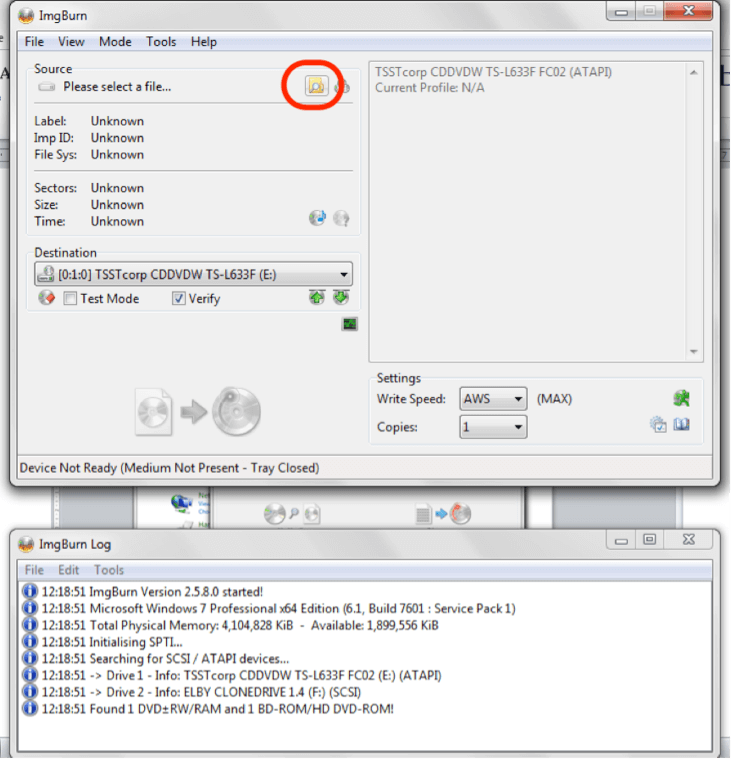
3) Install and open the Programm. You will find it „Programm“- Folder
4) Select „Write Image file to disk“

5) Now click on “Source” and select the downloaded Windows ISO file to be burned
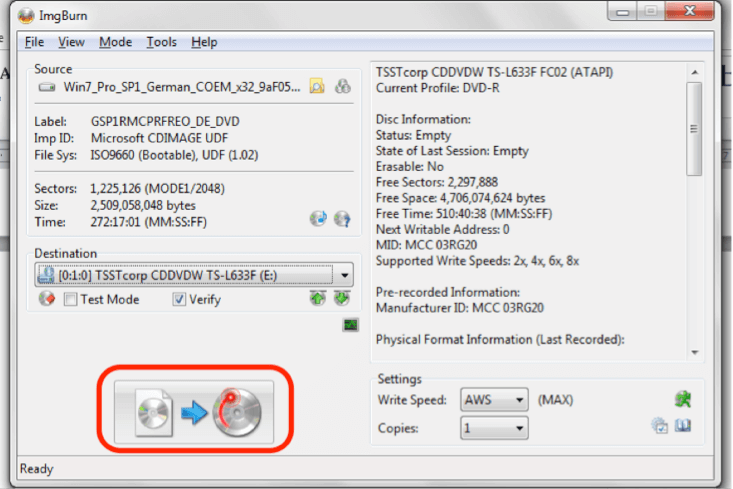
6) Insert a blank DVD and click the burn button (marked with red in the photo).
Create a bootable USB stick in Windows 10 (method 3)
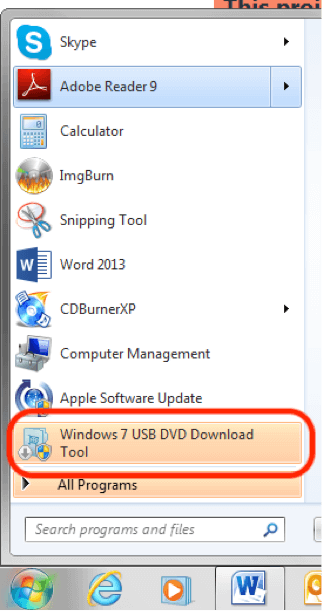
1) A bootable USB stick can be easily created with the “Windows USB / DVD Download Tool”. It comes directly from Microsoft and can be downloaded here http://wudt.codeplex.com/. Please be patient, the website loads very slowly. Click “download” on the right side of the website.

2) Install the program and open it. It should be in the “Programs” folder.
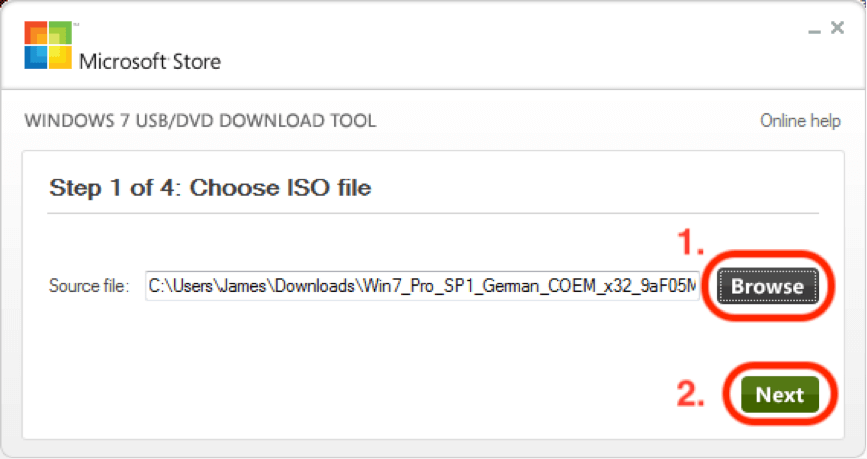
3) Now select the Windows operating system ISO file to be copied to the USB stick (“Browse”) and click on “Next”.
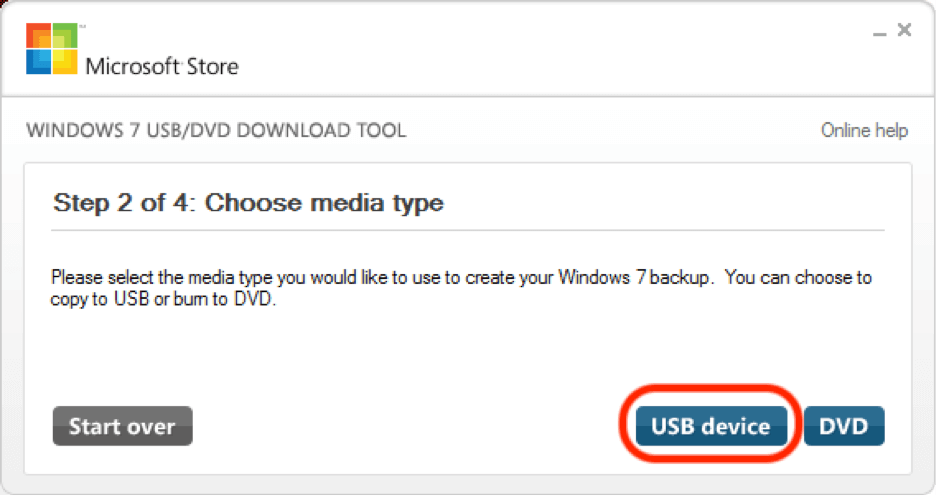
4) Now select “USB device”
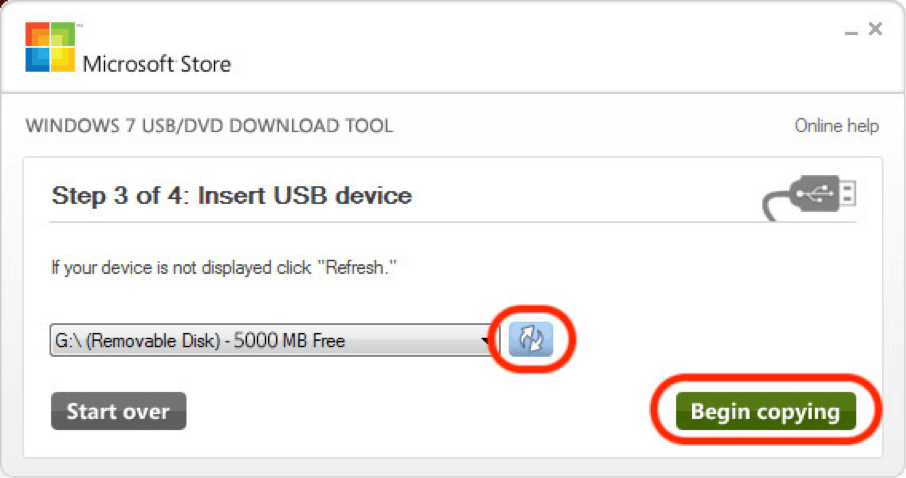
5) Now insert the USB stick, if it is not displayed, click on the small “update” symbol. Attention: The USB stick will be deleted completely! If there is important data on it, be sure to copy it to another location.
Now click on “Begin copying”. The bootable USB stick is created. This can take a few minutes.
Create a bootable USB stick from Windows XP or Vista (method 4)
Do you still have an older operating system such as Windows XP or Vista and want to burn the operating system to DVD or prepare a USB stick? Or did method 3 not work? We show you how to do it here. The “Windows USB / DVD Download Tool” mentioned above is less suitable for this, since some .NET components are installed here, which may no longer work. Therefore, the use of the freeware “Rufus” is recommended.
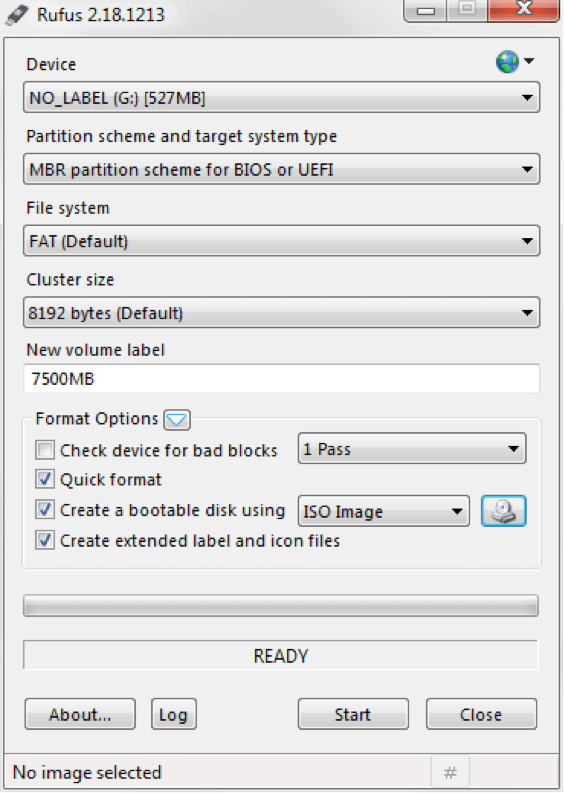
1) Go to http://rufus.akeo.ie
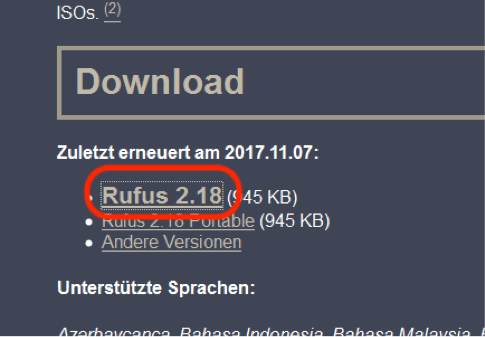
2) Find the “Download” area and be sure to download version 2.18 – this is the last one that still supports Windows XP and Vista. If a newer version is offered, go to “Other versions” to download this version.
3) Install and open the Programm.
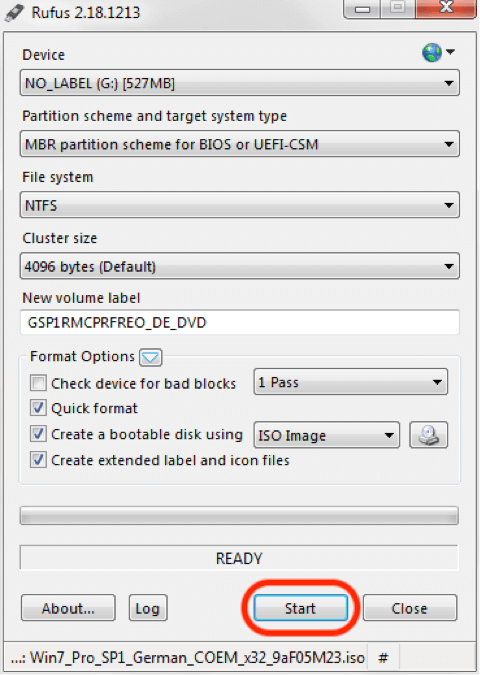
4) Now select the USB stick to which the Windows operating system should be copied (1), select “ISO Image” (2), and click on the file search icon next to it (3). Select the ISO file that you want to put on the stick and confirm the entry. Rufus automatically makes the correct settings.
Please note that the USB stick must be larger than the ISO file! You must also know that all data on the stick will be deleted. So make sure to backup the data if there is any on it!
5) Click on “Start” and wait until the files have been copied onto the stick properly.

You now have a bootable Windows DVD or USB stick.
Preparation Step 3: Install the operating system on your device
Have you now followed the instructions and created a boot DVD or bootable USB stick? Now you have to get your PC to boot from it and start the Windows 7 installation process.
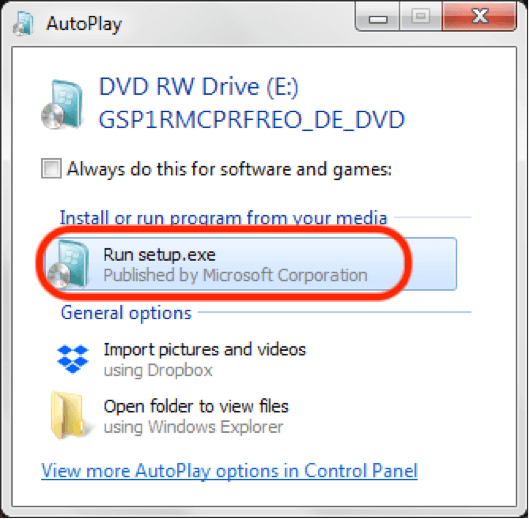
Method 1 (the simplest): insert operating system DVD
This is the easiest method, but it doesn’t always work. Simply insert the DVD and double-click “setup.exe” when the “AutoPlay” window opens.
For example, this is how it looks when you install Windows 7:
If the window does not open automatically, please open the Explorer and double-click “setup” manually.
The boot process should now start.
Method 2: Set boot order in BIOS
Regardless of whether you want to start from a DVD or a bootable USB stick, you must first tell the computer that it should boot from your medium, otherwise it will simply boot the system that is already installed.
The correct setting is determined via the so-called “boot order” in the BIOS. Here you set which device (DVD, hard drive, USB stick) should be booted first.
Insert the DVD or insert the USB stick into a free USB slot (we recommend the USB slots on the back of the device, as these often have a faster port) and restart the device.
Now it is important that you get into the so-called BIOS . The possibility to get into this only appears briefly during the start-up process. This is usually done by clicking the F2, F8, F12 or ESC key . The request can e.g. “Boot Menu” or “BIOS Setup” are called.
Select the start order “DVD” or “USB Flash Device”, confirm the selection and restart your computer.
Note : If USB booting is not available for selection in the BIOS, it may be that your computer is too old and unfortunately does not support booting from a USB stick.
Windows 10 Installation Step by Step
After you have successfully followed the above steps, your system will now boot and is in the process of installing the system. Here is a series of options that we will now go through together:
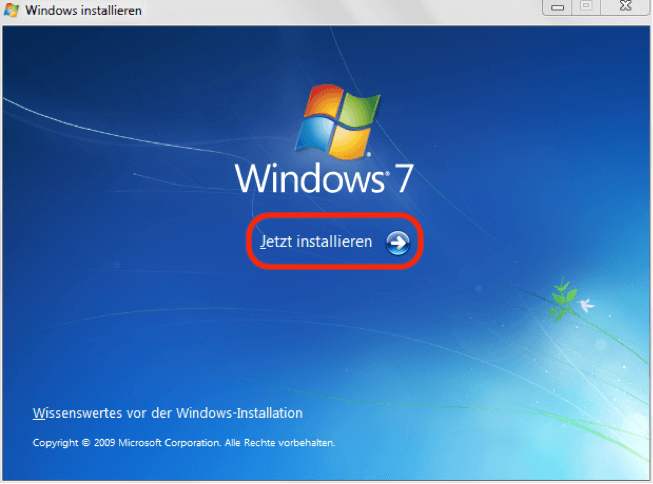
Select the desired language and region.

Now click on “Install now”.

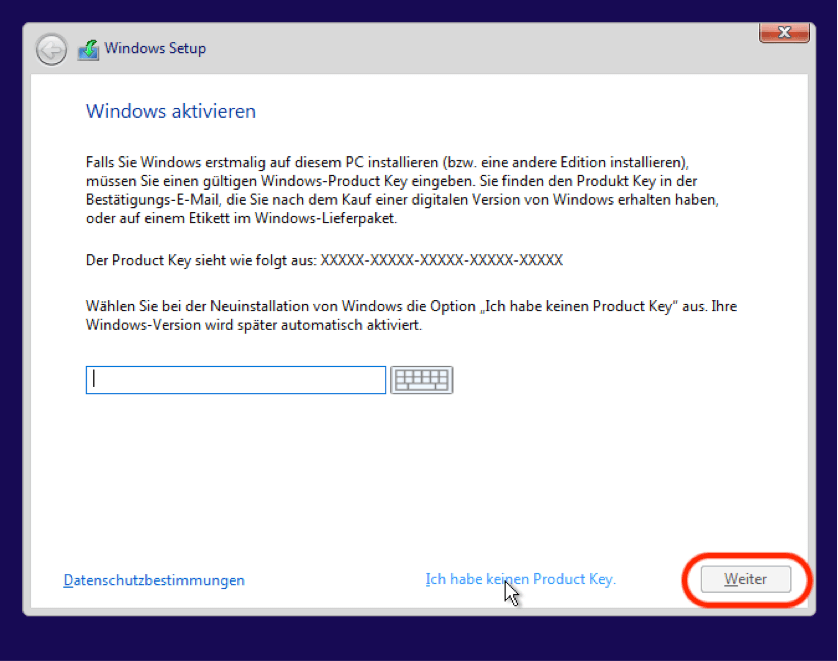
Now you can enter your Windows 10 product key.
Now accept the license terms and click on “Next”.

Now you can choose whether you want to upgrade an existing system (“Upgrade: Windows ….”) or whether you want a so-called “Clean Install” (“Custom: …”). The latter will delete all data if you install it on an existing partition. Please note that the upgrade only works if the same bit version is selected as for the original system. So it is possible to upgrade from a 32bit system to a Windows 10 system, but not from e.g. from 64bit to 32bit.
It is only possible to upgrade from Windows 7 to Windows 10, unfortunately older versions such as Windows XP or Vista are no longer supported.
In any case, make sure to backup your data , as there is always a risk of data loss!
In this guide, we opted for a clean reinstallation, ie “user-defined”.

Now select the partition on which Windows 10 is to be installed. If necessary, delete or format them beforehand (“delete” or “format” command), you can also create a new partition (“new”).
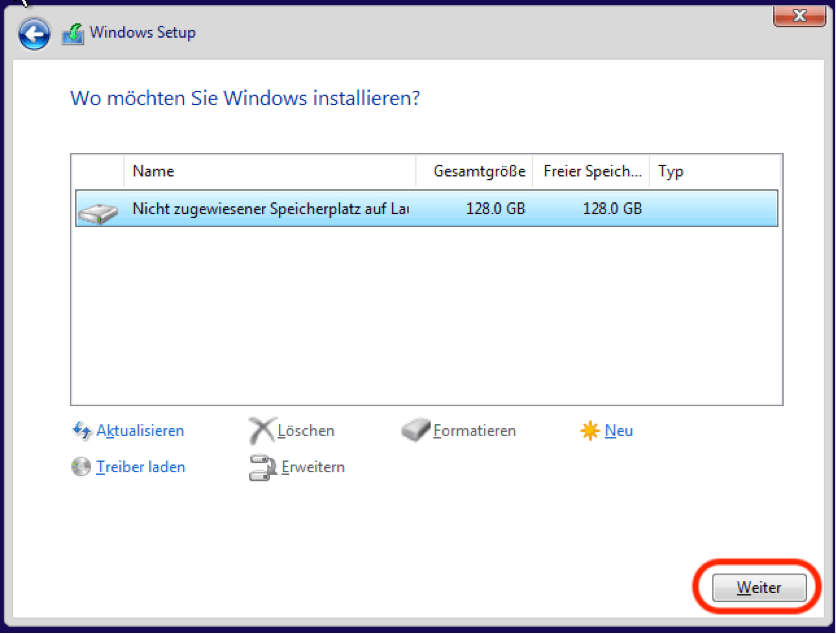
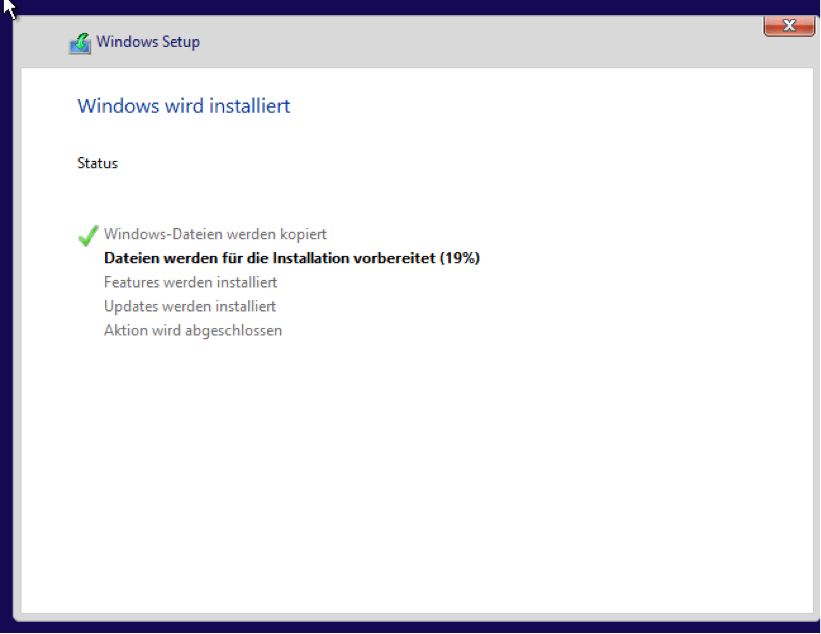
Now Windows is installed. This can take some time.